Cut a sheet into modules
A module is one part of your artwork, cut from a sprite sheet: a head, a hand, a sword, a whole sprite if you like. Frames are built from modules, so the cleaner your modules, the easier everything after them becomes.
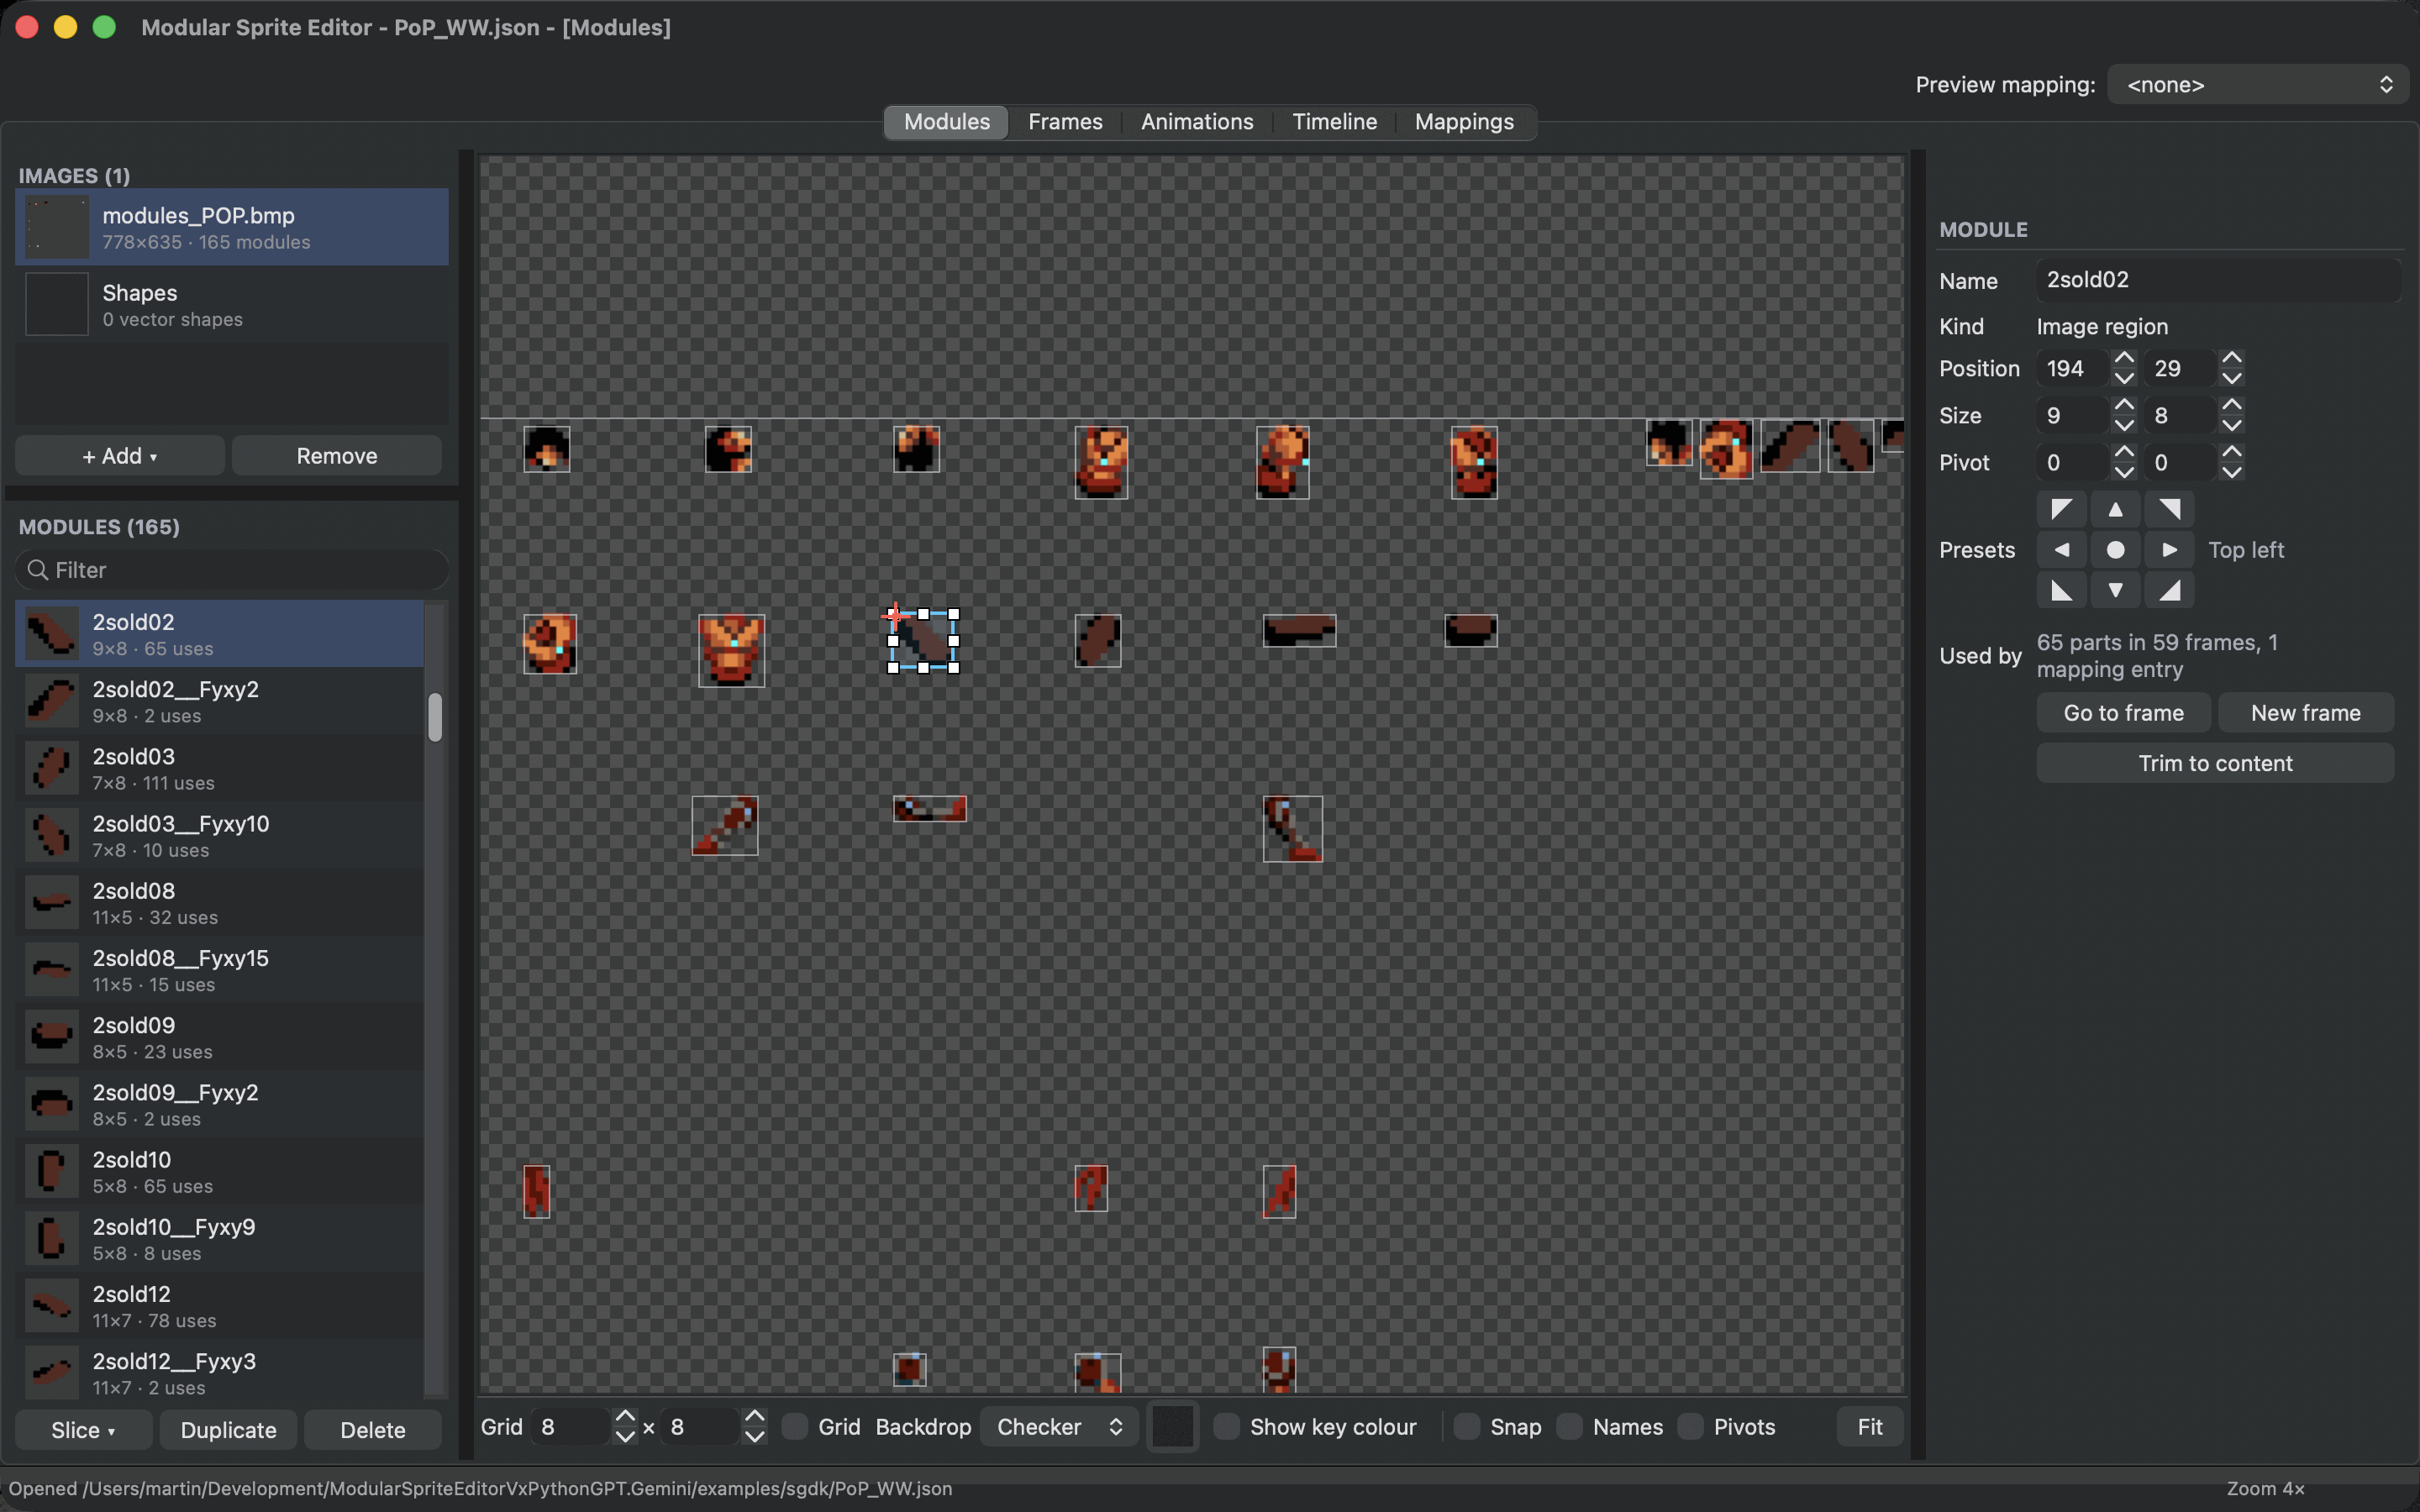
Add your images
The Images list at the top left holds the sheets of your project. Choose + Add ▾ ▸ Image... for one image or Folder... for every image in a folder. For a folder of single sprites, one file per pose, turn on Make each image one module in the folder window.
PNG with transparency works best. If your sheet uses a background colour instead, select the image, choose Pick next to Key colour in the inspector and click the colour. It becomes transparent everywhere the image is used. Turn on Show key colour in the view bar to see the original background again while you cut.
If you move an image on disk, its row shows that the file is missing. Select it and choose Locate... to point the project at the new place.
Draw a module
Drag a box on an empty part of the sheet to make a module. Then:
- drag the module to move it, or drag one of its handles to resize it;
- nudge it with the arrow keys, Shift for 8 pixels at a time;
- turn on Snap in the view bar to snap to the grid size set next to Grid.
Click a module to select it, Cmd-click to add more to the selection, and Cmd-drag a box to select every module inside it. Del removes the selected modules. The editor asks first when frames still use them.
Trim to content shrinks a module to the pixels inside it, which is handy after a quick, generous box.
Let the editor cut for you
Two tools under Slice ▾ cut a whole sheet at once:
Grid slice... cuts the sheet into equal cells. Set Tile size, and Offset and Gap if the cells have a margin or space between them. Skip empty tiles leaves out cells without any visible pixel.
Detect sprites... finds every group of touching pixels and makes it a module. Merge gap joins sprites closer than that many pixels, so a character with a separate sword or a dust cloud becomes one module.
Both windows show how many modules they will make while you change the settings. If the sheet already has modules, choose whether to keep them and add only new areas, or replace them.
For sheets of finished sprites there is a third tool, Auto modularize..., which finds parts the sprites share. See Find shared parts automatically.
Names and pivots
Double-click a module in the Modules list or press F2 to rename it. Clear names such as head_left or sword_swing2 help when you build frames.
The pivot is the point of the module that is placed when you use it in a frame. It is shown as a small red cross. Set it in one of three ways:
- Shift-drag on the sheet to move it;
- type it in Pivot in the inspector, counted from the module's top-left corner;
- choose one of the nine Presets. Bottom puts the pivot at the middle of the module's bottom edge, the usual choice for feet.
Pivots matter when parts swap. If every head of a character has its pivot at the neck, any head drops into place in any frame.
See where a module is used
The inspector's Used by counts the frames, parts and mapping entries that use the selected module. Go to frame opens the first frame that uses it, and New frame makes a new frame with just this module on its origin.
The Modules list shows a thumbnail, the size and how often each module is used. A module used zero times is a candidate for cleaning up.
Reuse cuts on another image
Select modules and copy them (Cmd+C). Select another image and paste (Cmd+V): the same areas are cut there. This is useful when you have a recoloured copy of a sheet with the same layout. A mapping can then swap between the two.
Shapes
The Shapes entry in the Images list holds vector shapes: rectangles, ellipses, triangles, lines and markers, filled or outlined, in any colour. Drag on its canvas to make one and choose its kind in the inspector. Shapes work like any other module. They are good for placeholders, simple effects and quick markers, and they are drawn pixel-exact at every size.
Tips
- Cut parts that repeat across poses: one forearm used in twenty frames saves nineteen drawings and their memory.
- A mirrored part does not need its own module. Flip it in the frame. The Mega Drive flips hardware sprites for free.
- Keep a part within 32 by 32 pixels where you can. That is the largest hardware sprite of the Mega Drive, see Stay within the console's limits.