Stage a scene
The Timeline tab puts several things in one scene: characters playing animations, single frames, modules. You move them with keys over time, flip them, put them behind each other and switch their animations on cue. Use scenes for cutscenes, intros, attract modes, or to test two characters together.
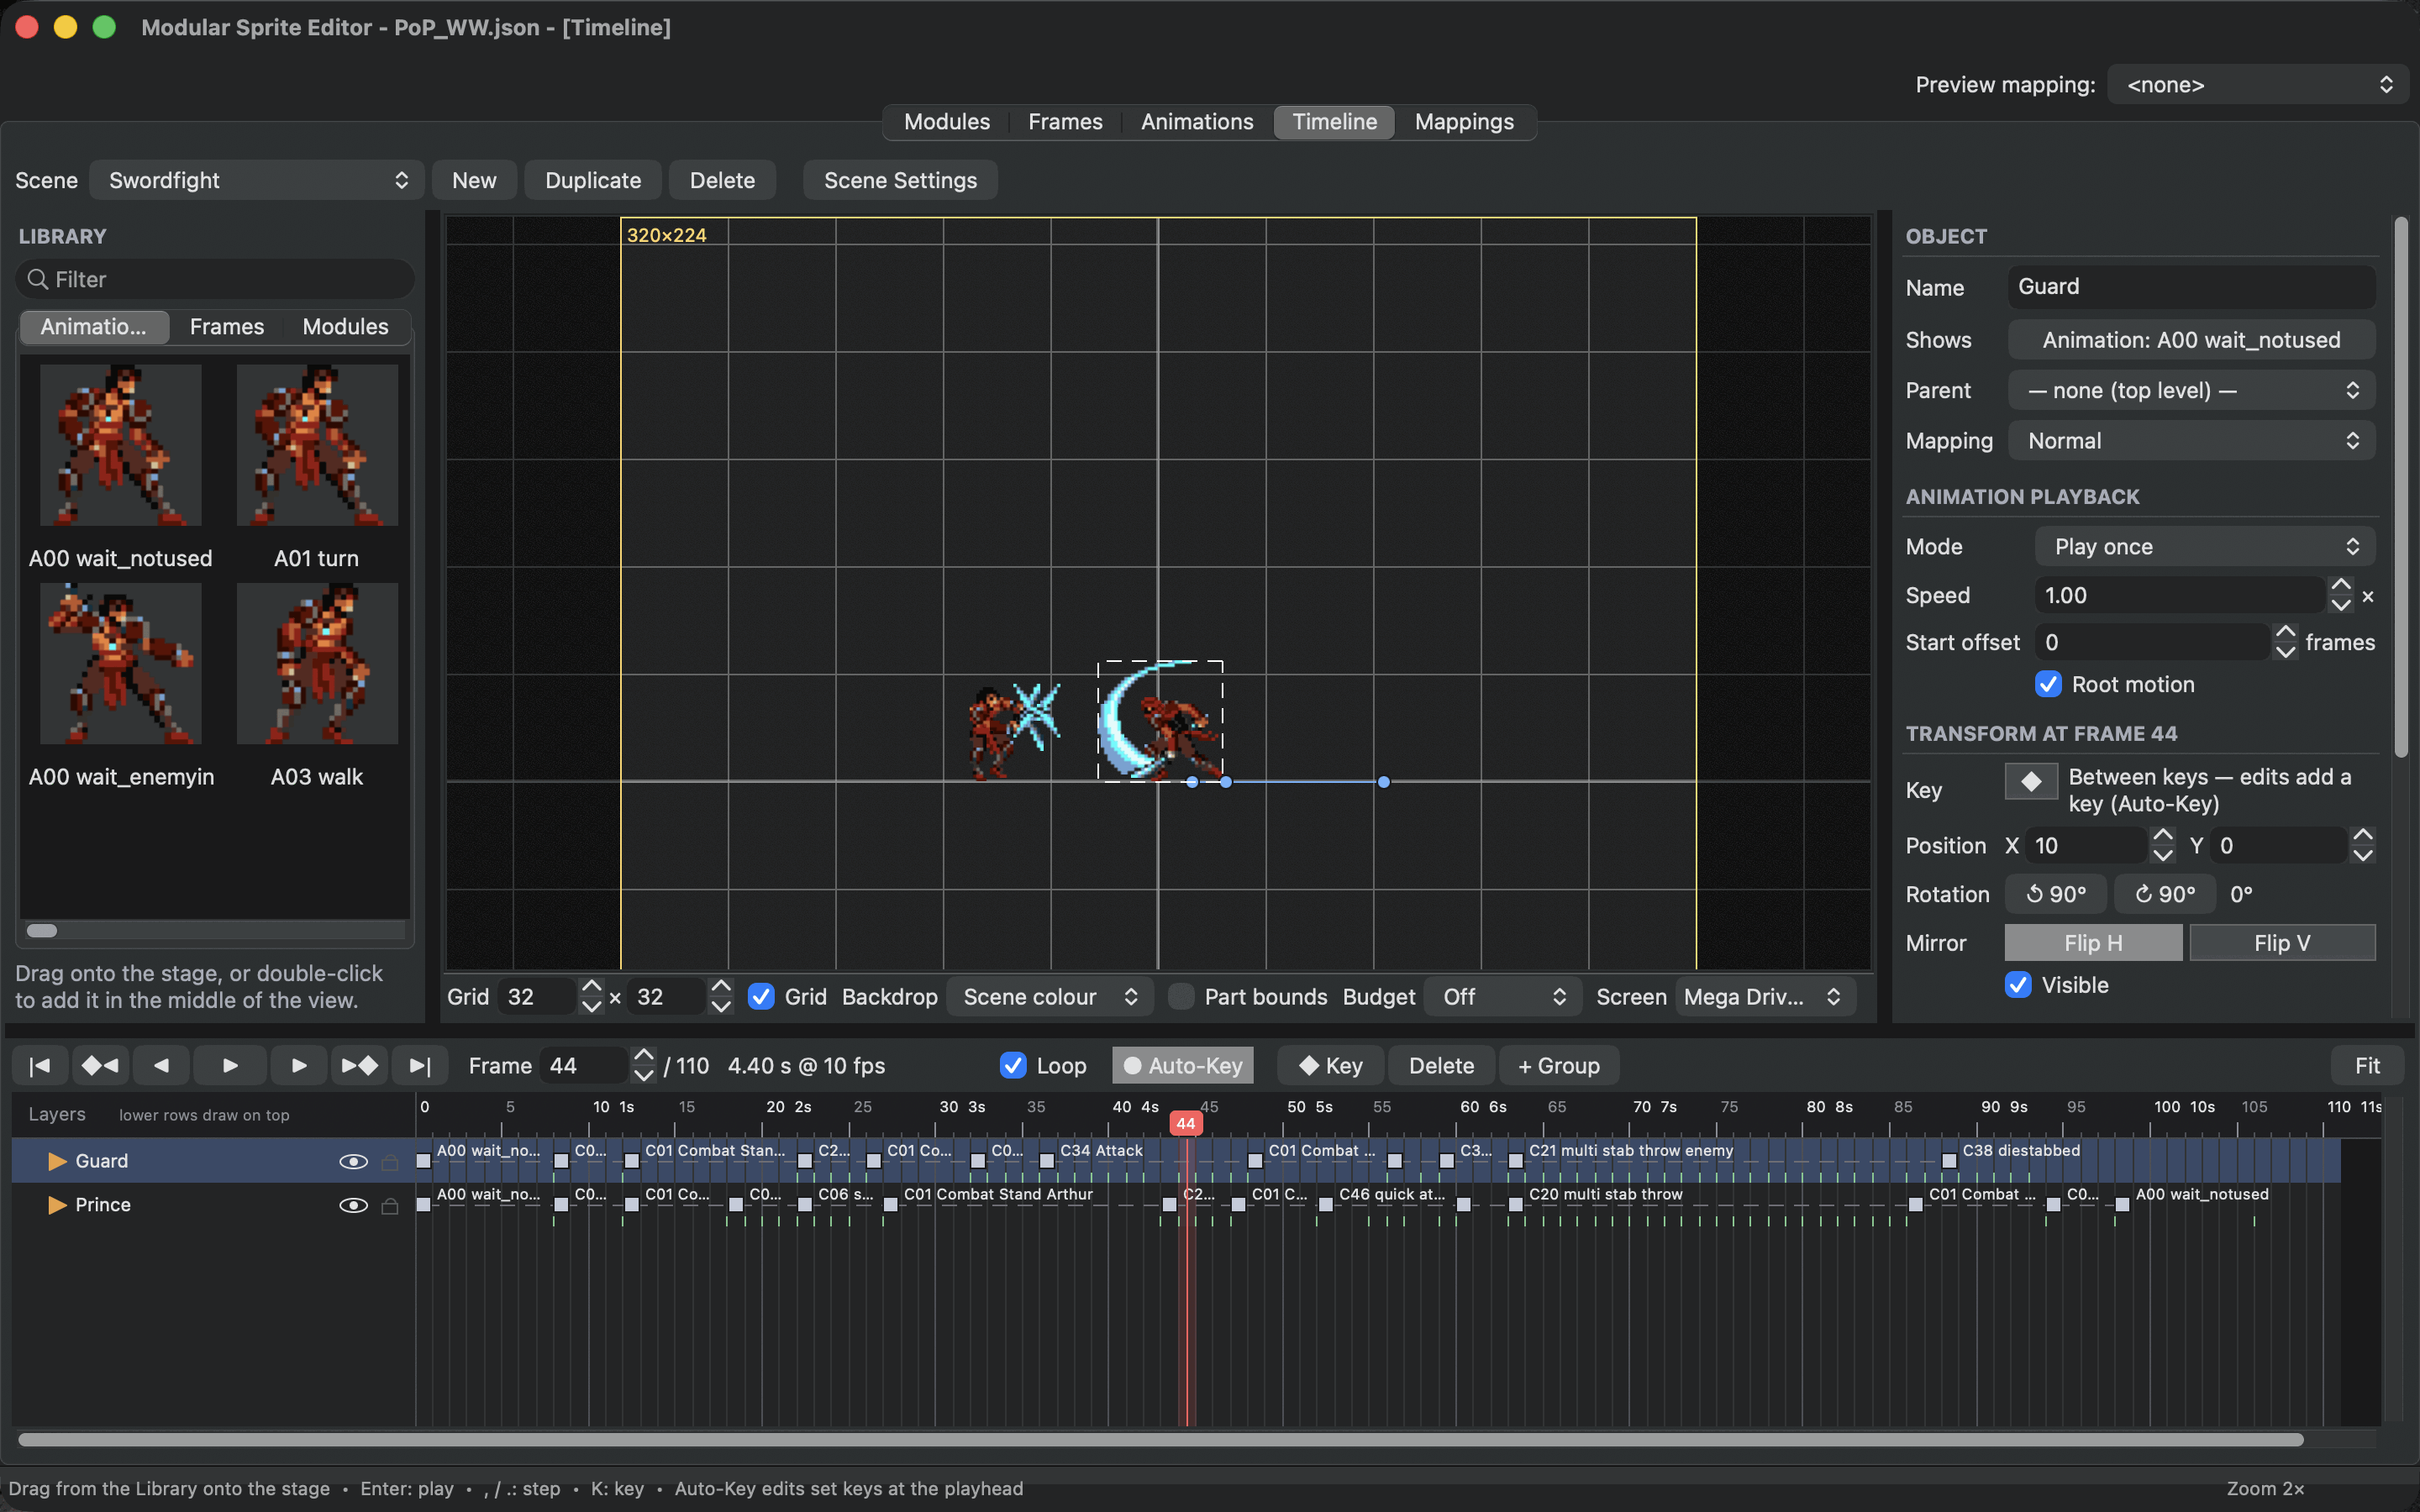
Scenes
The scene bar at the top chooses the scene and holds New, Duplicate and Delete. Scene Settings shows the scene in the inspector: its name, Frame rate, Length in frames, whether it loops, and its background colour.
The timeline counts in frames of the scene. A scene at 10 frames a second plays an animation at 10 ticks a second one step per frame, which keeps timing easy to read.
Add objects
Drag an animation, frame or module from the Library onto the stage, or double-click it to add it in the middle of the view. Each object becomes a layer. + Group adds an empty object that other layers can follow.
Layers are listed in drawing order: lower rows draw on top. Drag a layer up or down to change the order, or onto another layer to make it that layer's child. A child moves, flips and turns with its parent. The eye hides a layer, the lock stops it from being picked on the stage.
Keys
A key stores where an object is, how it is flipped and turned, and whether it is visible, at one frame.
With Auto-Key on, moving, flipping or turning an object on the stage sets a key at the playhead. With it off, the same edits move all of a layer's keys together. K sets a key at the playhead, and Shift+K adds or removes one.
On the timeline, drag keys to retime them, double-click a track to add a key and drag over empty track to select several keys. Copy and paste keys with Cmd+C and Cmd+V: they paste at the playhead.
Motion between keys
The bar between two keys shows how the object moves there, by name. Right-click it, or use Motion to next key in the inspector, to choose the easing:
- Linear moves at an even speed, Hold stays put and jumps at the next key.
- Gentle, Normal, Strong, Stronger, Strongest, Exponential and Circular speed up and slow down more and more. Choose whether the motion eases in, out or both.
- Overshoot, Elastic and Bounce go past the target and settle.
Path chooses a straight or curved path. On a curved path, drag the handles on the stage to shape the curve; Reset curve handles brings back the automatic curve. The stage draws the path with a dot for every frame, so you can see where the motion is fast or slow.
Change the animation at a key
Select a key and turn on Swap the image here in the inspector. From this key on, the object shows another animation, frame or module. An animation swapped in at a key plays from its first step at that key, so you can cue an attack, a hit and a fall exactly when they should happen. Offset shifts the swapped image, for when two animations do not line up.
Animation playback in the inspector sets how an object's animations play: Mode (loop, play once or ping-pong), Speed, and Start offset to start the object's own animation a few frames in.
Root motion lets the object move with its animation's step offsets, the way a run moves forward. It follows the object's mirror: a fighter flipped to face left steps forward to the left.
Give an object its own look
Mapping in the inspector chooses the mapping the object is drawn with. Inherit uses the parent's mapping, or for top-level objects the preview mapping at the top of the window. Original modules always shows the original parts. In the Swordfight, the guard is the Prince's animations with the "Normal" mapping.
See it on screen
Screen in the view bar outlines a console screen: Mega Drive, SNES, NES, Game Boy Advance or Game Boy. The scene's origin sits where the Mega Drive demo shows scenes, in the middle and three quarters down, so what is inside the outline is what fits on the console's screen. The Budget overlay counts the hardware sprites of everything in view at the playhead.
Press Enter to play the scene. , and . step one frame, Shift+, and Shift+. jump between the selected layer's keys.
The Inside the Swordfight page shows how a finished scene is put together.